| ericchadwick.com | ||
| EHP Bookmaking Notes | ||
|
These notes come from a bookmaking course offered by Elly Nagaoka and Donald Partyka, December 12 1990 during the RISD EHP in Rome.These notes have laid buried in my basement for the intervening years, so any omissions are entirely the fault of my old leaking brain. As a kind soul pointed out, more details on bookbinding techniques can be found on Douglas W. Jones' Bookbinding website. My notes are also being shared at ConceptArt.org. I'd like to hear your thoughts, if this helped or hindered you. Good luck! The finished result: 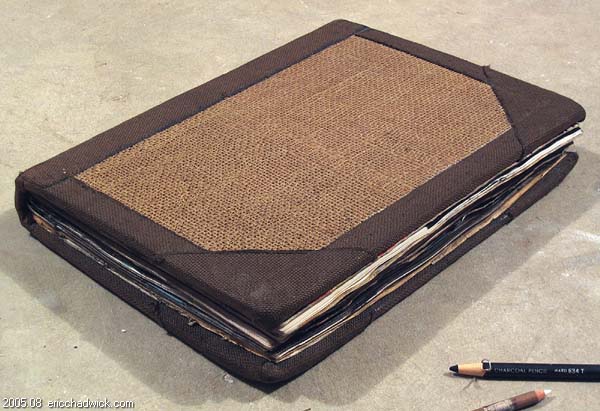 1. MaterialsCord:Sew with good cord: linen thread or 100% cotton. Tensile strength should be strong. Pull as hard as you can to break, it shouldn't break. Fishing line isn't recommended... weakens with bending and becomes brittle with age. I skimped by using cheap thread, don't know what it's made of, my book is starting to fall apart now that I'm using it once again. Let that be a warning to ya! Needle: Thick needle. (One I used was about 5 cm long). 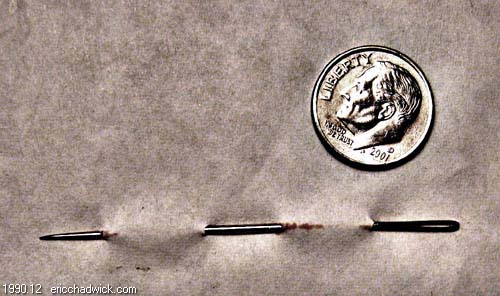 Thread cord through needle eye, pull through 1cm longer than needle length. Then pierce 1cm from end of cord onto the needle tip and pull it tight against eye. Helps keep thread on needle, resisting the extreme force you'll bring to bear later. 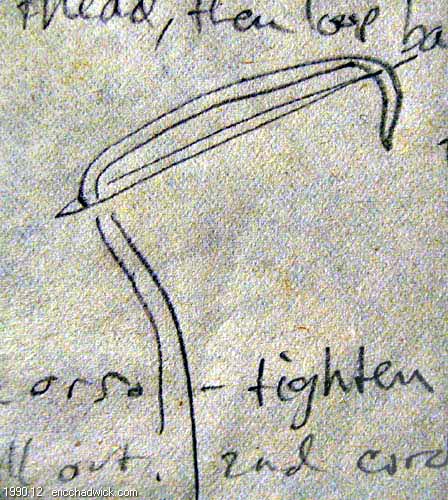 Paper: Use four to five sheets to make each ream of paper. Make as many reams as you want, for as thick a book as you want (I used ten reams of five sheets each, ended up with a book 3 cm thick excluding the cover). Fold sheets in half, all four/five sheets folded together not individually. If paper has horizontal lines, always fold perpendicular to them. Helps expansion, gives cleaner fold. Sharp crease is best, burnish both sides after folding the ream. Bookbinding rack: This wood frame holds two vertical strips of ribbon or cord. These two strips will be used to hold the reams together, because you loop the ream threads around the verticals as you thread each ream. 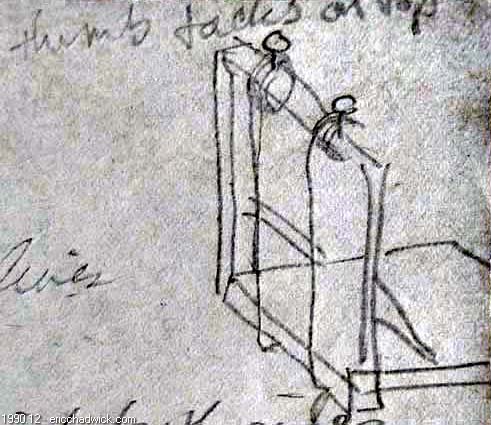 The rack. Thumbtacks on top hold the cord (or ribbon) while you're threading a ream. Take the tacks off to loop/knot the cords through each ream before the next ream is added. 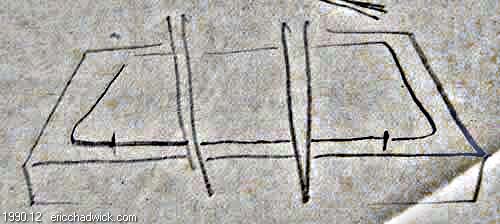 Where the cords/ribbons go. Ribbon is better than cord for thick books. Ribbon is less flexible but stronger. Cord is better for opening book wide and flat. Cord is fine for medium or thin books. (I used ribbon) To glue the pieces together, use bookbinding glue, not regular white glue. It's archival, so it won't become brittle or discolor with time, and it's strong enough to withstand shear stresses. 2. Sewing the reamsEach ream will get six holes down its spine. Edge holes should be 1.5 to 2 cm from edges. 2nd hole should be 1/3 between 1st and last hole. 3rd hole should be 1cm from 2nd. 4th hole is 1/3 away from last hole. 5th is 1cm from 4th.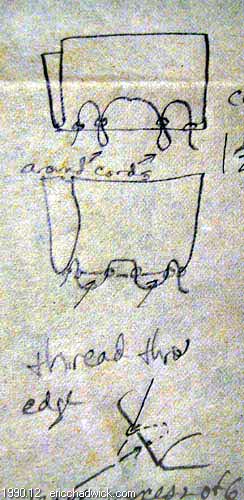 Two threading methods. I used the lower one. Lay first ream down onto rack, spine against the vertical ribbons. Push needle into ream to thread 1st hole from spine side, inwards towards inside of fold. For thick paper, twist needle like a drill bit. Thread 2nd hole back outwards towards spine. When you loop back inwards again through 3rd hole, go around the first vertical ribbon that's hanging from the bookbinding rack. 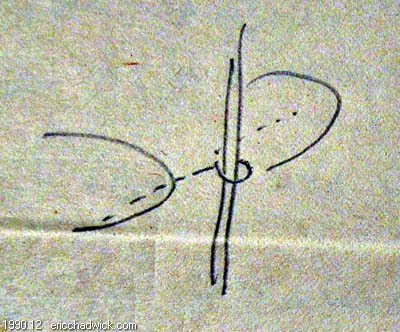 Looping ream thread around the cord. Obvious isn't it? Then go into 3rd hole. Repeat this between the 4th and 5th holes, going around the 2nd vertical ribbon. Finish the 6th hole with thread coming back out towards spine. Pressing a hand down hard on the ream, and holding the start of the thread, pull the end of the thread tight. Make sure to leave about 6 inches of thread at the start. 1st ream is now threaded onto vertical ribbons, and its sheets are firmly bound together. 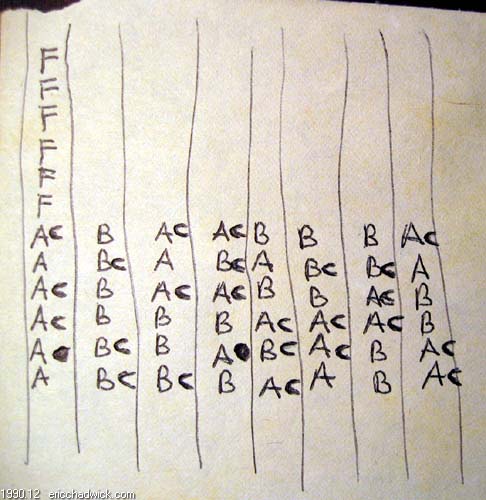 This might be a threading diagram. I don't have any notes about it, but some details about threading are covered in . Start threading the 2nd ream, starting at the opposite end of the book, since this is where the first ream left you. Start with the end of the previous ream's thread, going into the next ream's 1st hole. Loop around the cords/ribbons on the way. When you reach the end of threading the 2nd ream, start threading the 3rd ream, going back the other way. When you reach the end of the 3rd ream, you'll encounter a vertical loop of thread between the 1st ream and the 2nd ream. Before starting to thread the 4th ream, loop the 3rd-ream-end thread through that vertical loop, which will help knot the 3rd ream onto the 1st and 2nd reams. This end-ream-looping helps keep the reams tight together at their ends. 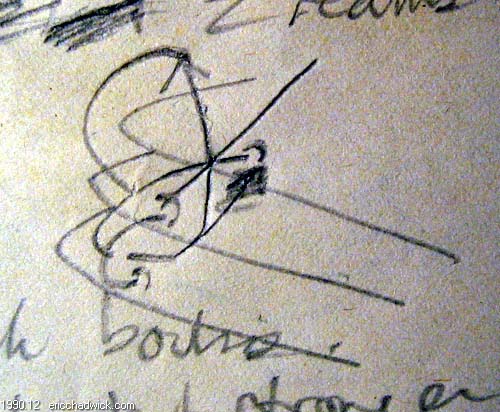 How to loop the cords/ribbons between each of the reams, to knot the reams vertically to each other. 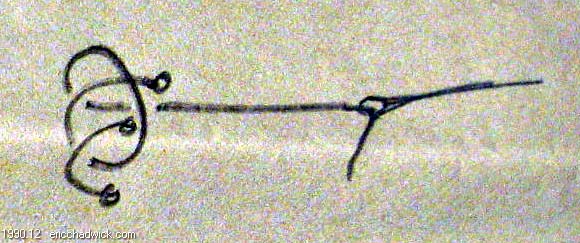 Same thing, I think. Maybe clearer. Finish threading all the reams, looping/knotting them together through the end loops. I don't have any notes on this, but you have to do something with the start of the thread and the end of the thread. I'd guess you just tie them in a knot around the nearest end-loop. 3. Binding the endpapersCut the two cords or ribbons that you sewed the ream thread around, leaving 1 1/2 cm at each end. Burnish it out so that the fibers are as flat as possible. Unwind cord and pull apart fibers.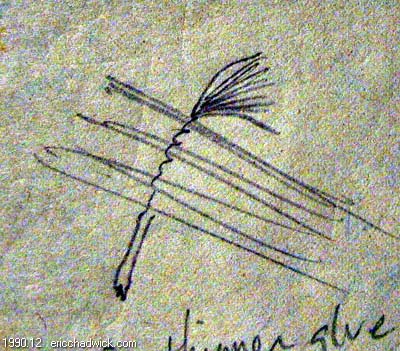 Flattening the cords. Glue end papers to the bound reams. Endpapers hold the book to the cover. Same or different paper than reams, just not too thin. To glue, overlap the endpapers along the edges of the reams, and use a narrow strip of glue around the edges, about 1/4 cm wide. Remember, bookbinding glue is strong. Press the book until dry. 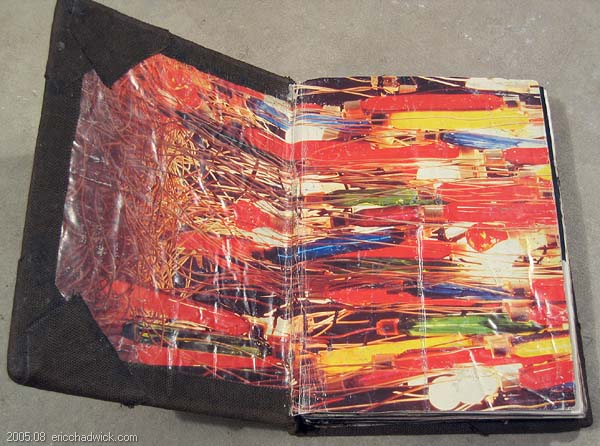 For my endpapers I used some posters that I cut from billboards around town. After endpapers are dry, pull each flattened cord/ribbon tight across the spine and glue it to the backsides (outside of the book) of the front/back end papers. Use a brush to apply glue to the flattened cord/ribbon. You can use a thinner glue solution (add water) for the cords/ribbons and endpapers, but you must use full strength for the actual cover. 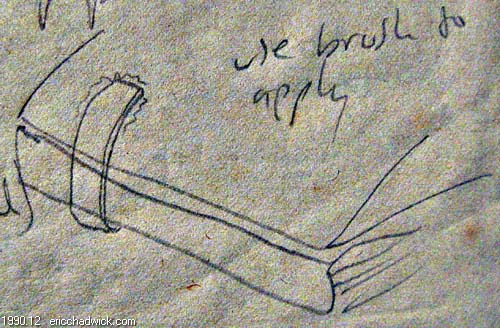 A ribbon being glued onto the endpaper backside/outside. Reinforce over the ribbon/cord and endpaper (fron and back) by gluing thin brown craftpaper over them. Only glue it to the endpaper, don't reinforce around the binding. Allow to dry. 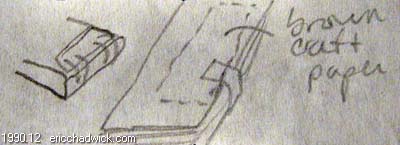 The craftpaper reinforcement. 4. Hammer the bindingAt this point your book is likely to have a concave spine. You'll want a convex one instead, so you hammer the binding to tighten it, round it out. A loose and concave spine, yuck! Pulling the edges of the book, happer the spine with a rubber mallet.  Ooooh, nice sketch, man. Also hammer into the creases. This will round out the spine. 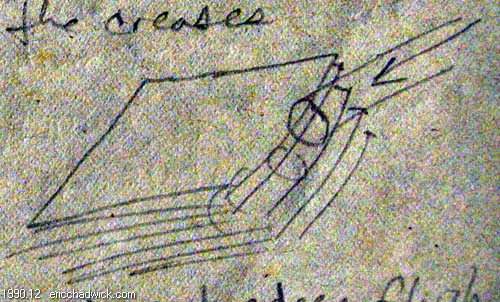 Hammering the creases. After hammering, use a guillotine to cut the ream edges flush. [ummm, didn't have one of those. I was fine with the rough edges. But if you want, take it to your local small printing press shop, they have a cutter that'll slice it in no time.] 5. Reinforce the bindingReinforce the entire binding with a wide strip of meshy/gauze material, that runs the full height of the book. It should overlap the endpapers by about 1 1/2 inches. Coat this material with full-strength glue, using a brush is easiest. Let it dry fully.6. Measure the cover materialUse a string or fabric for accurate measurement of width of binding. Exact measurement is essential. The height of cover is exact height plus 1 cm. Breadth of book (from back to front) is exact measurement minus 1/2 cm. This is due to the space left between the spine and cover fro flexibility. If the space is not left the cover will "hang over" the body of the book too much. This, of course, can be a matter of preference.Cut the covers from heavy cardboard. The cardboard striations should be vertical for more strength... books are shelved vertically, etc. One side of each of the front and back covers should be filed down, one edge only. 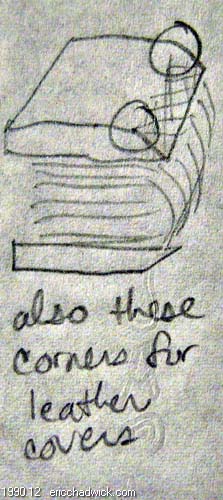 File down these edges. If using leather for the cover, file down the circled areas too. The spine should be cut from thin flexible cardboard, very precisely, its exact measurement in height and width. 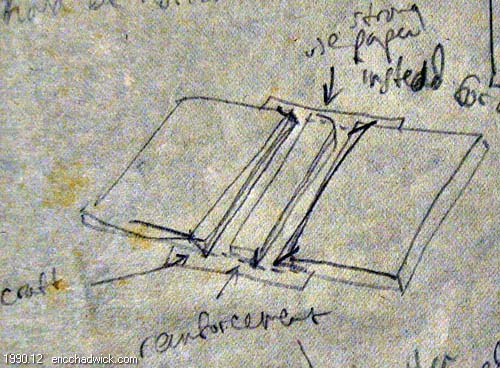 The spine is the long thin section in the middle here. Note how the filed-down edges face up, this is the outside of the cover. Once the cover is wrapped in the finishing material, those bevels will help round out the spine. Cut a piece of brown craft paper or thin cardboard to reinforce the three cover pieces. This will run along the inside of the cover, in between the cover pieces, and act as the "hinge" for the covers. It should be cut to exact height of spine, the width a couple of inches on either side of the spine piece. The more bendable direction of this piece should run horizontal to the book, so it bends smoothly when the book is opened.  Bendable direction should be same as book bend. Cover one side of the "hinge" strip with glue and center the cardboard spine. Place front and back covers on either side of spine (as you would when a book is fully opened). The distance between spine and covers for a standard-size sketchbook is 1.1 cm. However this can change depending on the flexibility desired. The flat sides of the covers are glued down, the beveled edges face towards the spine and upwards away from the glue. Press down on the hinge paper and burnish around the spine. The skeleton of the cover is now finished. 7. Cover spine and cornersIf you wish, you can use strips of cloth/leather to cover only the spine and the corners of the book, with decorative paper covering the remainder of the covers. If instead you want to use a single piece of leather for the entire cover, skip to step 8.OK, flip the cover over. Cut cloth/leather for spine and corners. Cut them a little larger than the book, so the edges that drape over to the inside of the book can be covered neatly by the endpapers. And the edges that lie on the outside of the cover, and either side of the spine, can be covered by the decorative cover paper. 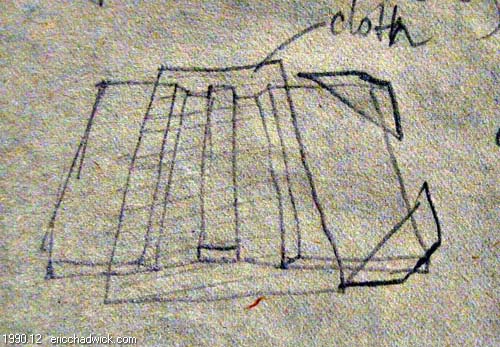 This is actually the outside. Glue, fold over, burnish well (especially around the spine). For a good corner, fold one edge over, burnish, then fold the other so that the corners meet in a "V" and the corner of the cardboard won't poke through. This is similar to the method of tucking in corners while stretching a canvas. If you like the little cords that you see sometimes going across underneath a leather spine, first glue down some short strips of leather before the spine cover is glued down. 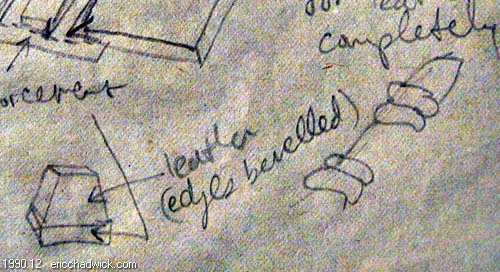 Decorative strips underneath the spine covering Now cut the final decorative paper layer, which covers the rough edges of the leather/cloth spine and corners. Cut it to size, glue and burnish. Skip ahead to step 9 to bind the cover to the book. 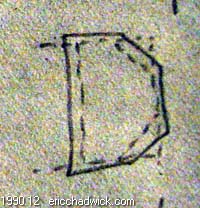 Cutting the final decorative paper. 8. Cover with 1-piece leatherIf you want to make a 1-piece leather cover, cut it larger than the book all around. The edges of the leather should be skinned all around the inside, to aid the fold-over and gluing. Wet the leather inside thoroughly with a sponge, brushing it and pushing the water in. Keep it wet during the whole gluing process. Full-strength bookbinding glue is essential when working with leather.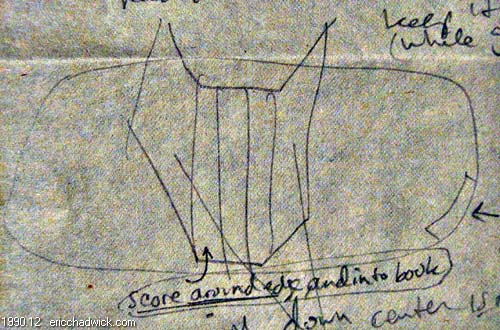 When folding the leather corners, glue and fold over the center of the corner first, burnishing the fold. Then glue and burnish the remaining edges on either side, to pleat the corners. 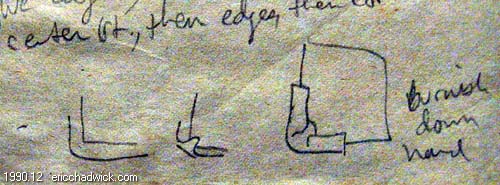 Pleating the corners. 9. Bind the cover to the bookBefore binding the cover to the book, you can cover the spine of the reams with decorative fabric. This hides the sewing and reinforcement used for the spine, since this area can be seen at the top and bottom of the spine when the book is open.Open the prepared cover, whether leather- or paper-covered, inside up. Place the book inside so that spine of book is aligned with spine of cover. Generously and evenly apply full-strength glue to the inside front cover only. Leave a margin around the edges for seepage during pressing. Close cover and press. Open book with spine flat on table and burnish endpaper onto front cover. 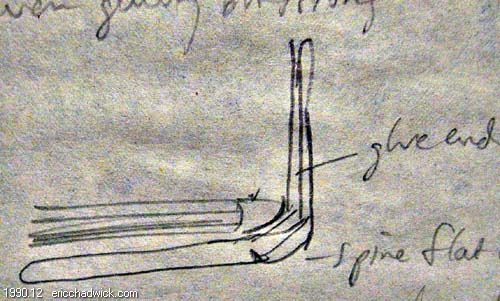 Be aware of any excess glue because the cover will become struck to the first page of the book. Do likewise for the back cover and press book closed overnight to dry. Notice that the spine of the book is not glued to the cover. Finito! 11. Miscellaneous Not sure what this is about. Might be millimeter measurements for something. 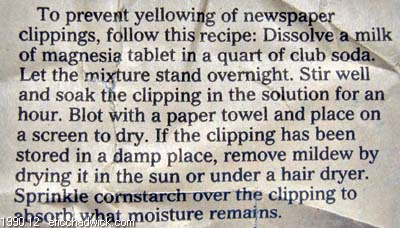 I have some nice drawings I did a while back on cheap newsprint, but I've never actually tried this. Guess they aren't really worth all that effort. This might help someone else though... |
||
| ericchadwick.com | ||